Rolling, rolling, rolling...

Rawhide references aside, this weekend broaches yet another milestone in the build. For the past 5 or so years the car has sat on axle stands whilst I tinkered about with different suspension setups, but now, after deciding to postpone my plans for the crazy suspension and fitting a stock (ish) IRS setup, it finally stands on it's own four wheels again.
After experiencing a few hiccups over the past few weeks, I must admit to being a little disheartened with the build. The first issue I came across was having to finally admit defeat with the wheels I had chosen and source a set with a greater offset, this was the topic of conversation for my last blog.
Well, since then, I have had more bad news. Last week I dropped off the flywheel, crank, fan etc to the engine balancers to get balanced, only to be told a few days later that that crank had a 5 thou bend in the middle. The crank had come as part of a kit that I bought from a mate, who had in turn bought it from one of his mates.
After a bit of detective work I managed to get hold of the original receipt and called up the supplier. The supplier in turn called up the manufacturer (scat), who said that they would straighten it provided that I paid for the postage. Realising that postage to and from the USA would run into a pretty penny (about $500 worth), I opted to find out how much the guy doing the balancing would charge. He advised me that it was not a good idea to straighten the crank as it was very bent and could still possibly be fatigued enough to break / crack. So with this in mind I ordered another crank, but this time from a local supplier.

The original crank was a scat 4130 'Volkstroker' a budget forged crank with 78.8mm stroke. I decided to go with an AA performance 82mm 4130 forged stroker, mostly as the case I bought is already clearanced to accept it, and it was the same price as the shorter stroke. The crank duly arrived earlier this week and currently is with the engine shop being balanced.
The issue I reported on in my last blog post relating to the clearance between the master cylinder and the steering arm has now been fixed. I purchased some bump steer bushes to allow me to flip the ball joint upside down, only to find out that they were for a late model bug when receiving them. Not one to admit defeat easily, I decided that the only course of action was to turn some more down of my own.

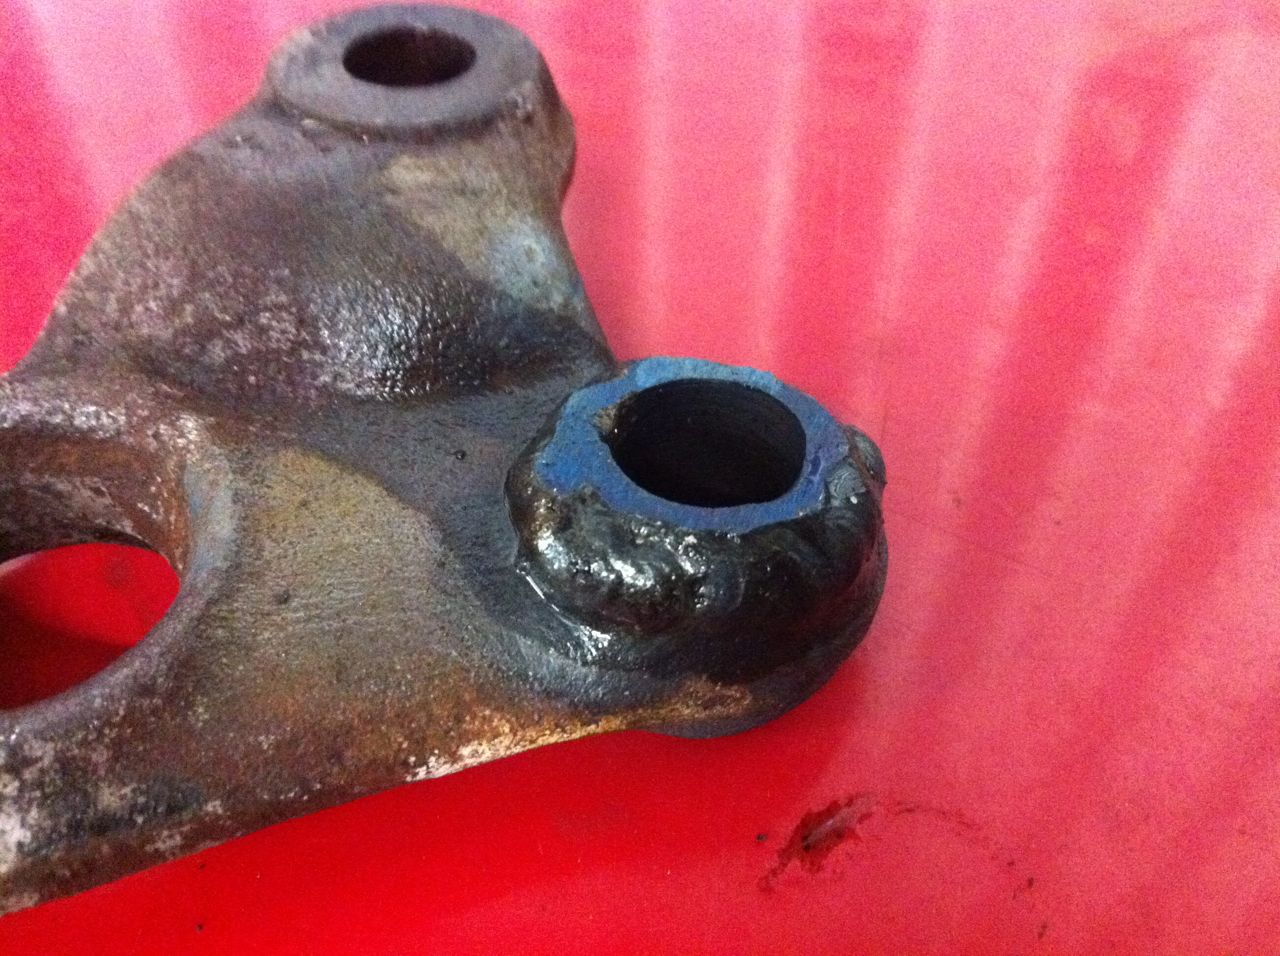
I started off by boring out the existing steering arm to 16mm. I then turned down an insert with a shoulder that could be pressed into the hole. I then drilled the insert out to 10mm and turned a 7.5 degree taper into it so that it fitted the ball joint.
With the insert finished, I pressed it into the steering arm, and TIG welded it in place.

With the steering arm finished, I refitted the steering box, steering arms, steering damper and other steering components, and checked that the tracking was roughly correct and that the steering wheel was aligned centrally.

I also removed the engine and gearbox from the car. I will rebuild the gearbox and add some uprated side plate covers, this will then get refitted along with the new engine.
With the front end finished and engine removed, I finished off fitting up the rear end and bolted some wheels in place. it was then time to let it down off of the jack stands. I rolled the Ghia out into the open and decided to give it a quick wash down. Over time the car has got very dirty, from what I'm not 100% sure, but it was mucky to say the least. A quick wash over with a sponge and bucket of warm water did the trick.


The car is now ready go go off and have the headlining fitted, which will hopefully happen Monday week. Then once this is done I can start refitting the interior.
Having rolled the car out of the garage, another thing I managed to take a look at this weekend is the jacking beam that I bought from ebay. This is to fit into my pit and allow me to work a bit easier. It's probably a bit late for the Ghia - especially considering that brakes and suspension are mostly done, but will no doubt come in very handy in the future. Unfortunately the beam sits a bit too high at the moment, so I will need to add some 'rails' into the side of the pit for it to run along. This will allow me to drop it down, I will set these at a height to allow the top of the jack to be flush with the floor.

Comments 2
good work mate, i like the pit jack
good work mate, i like the pit jack ;)
Yeah It turned out a bit bigger than I expected. Looked tiny in the photo but I recon it's good enough for a small armoured tank :P
I should be able to lift the car high enough to crush it against the roof
Roof chop anyone???
Yeah It turned out a bit bigger than I expected. Looked tiny in the photo but I recon it's good enough for a small armoured tank :P
I should be able to lift the car high enough to crush it against the roof
Roof chop anyone??? :D