There's been a burnley
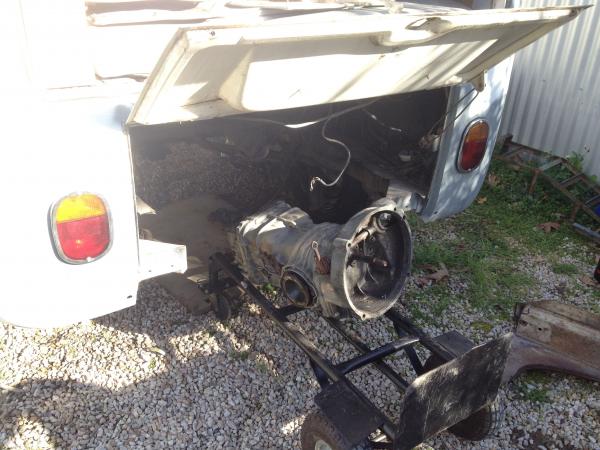
Took a few days off in the week to get some more stuff done on the lowlight. My target for this week was to get the brakes finished off, get the gearbox in and paint the front doors. As I had already done most of the brakes there was only the front nearside left to do and change out the rear flexi hoses and shocks.When I removed the front nearside drum I was met by a bit of a surprise, the brakes were missing. There had been a Burnley.
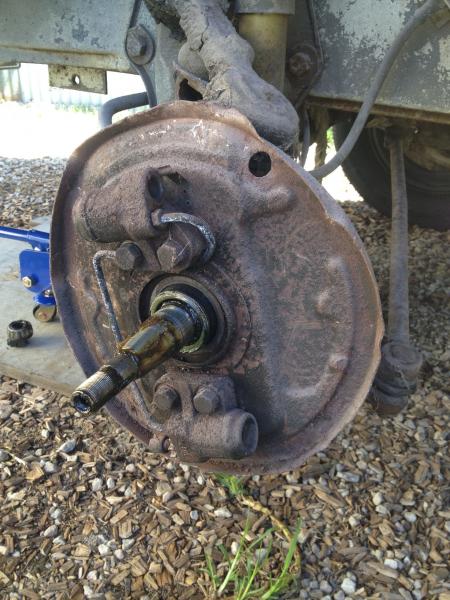
Unfortunately the backing plate had also taken a bit of a hammering but as the whole thing needed to be removed I straightened it out on the anvil in the garage. It was a good job I had decided to replace the cylinders and shoes with new, so the missing parts were not an issue. The only parts that I needed to recycle were the adjusters which fortunately were still present and salvageable.
With the new brakes fitted, new flexihose and new shocks I switched my attention to bleeding the brakes. A few years ago I bought a vacuum one man bleeding kit which is an absolute must if you are attempting to do this kind of stuff on your own. After trying to bleed the rear nearside slave cylinder for a little while I noticed that there was no fluid coming through, it was then that I remembered that I had forgotten to change the rear flexi hoses.
A not uncommon issue with old VW's is that the flexi hoses tend to swell up when they get old. This usually has the effect of keeping the brakes on as it restricts the fluid from returning when you release the pedal. In extreme cases it will stop the brakes working altogether.
Fortunately I had ordered new rear hoses along with the rest of the brake stuff, so I fetched these along with the relevant tools to swap them over. After removing one of the old hoses, plugging the end of the hard line with my finger to stop the fluid from draining out and getting one of the new hoses out of the packet (mostly with my teeth), it was right about this time that I realised that the flexi hose was not the right kind. Whilst it was the right length, it had a male and a female fitting instead of two female fittings. Bugger!
I refitted the old hose to prevent the fluid from draining out and hot footed it over to Volksfactory to get some correct hoses. A point to note is that on lowlight busses there was a changeover for many parts during the 1970 model year. This means that for lots of things such as rear flexi hoses you actually need to check the VIN to see if your bus was pre or post change. Many sites do not list the changeover VIN numbers for these parts, so beware if you have a 1970 bus. Fortunately $20 worth of flexi hoses is not too big a mistake, plus I'm sure that I will use the hoses on something else down the track.
After hot-footing it back I just managed to fit the hoses up and bleed the brakes before losing the light. Shame I had to waste time fetching parts, but at least now the bus was rolling on all four correct wheels.
The next day I had a visit from razor who helped me out bleed the brakes again. Unfortunately the o-ring in my one man bleeding kit decided to perish which caused a bit of a leak so it was back to the old fashioned "UP-UP-DOWN-DOWN" method. After bleeding the brakes and a bit of a chin-wag about razor's supercharged 36hp project he made some tracks and left me to concentrate on fitting up the gearbox.
As a matter of course I changed out the input shaft oil seal and replaced the selector coupling with a new one. I probably should have also changed out the selector shaft bushes as this is an engine-out kinda job. Unfortunately I hadn't considered this before this point. I checked the bushes, which weren't too badly worn, so decided to go ahead.
Fitting the gearbox was pretty easy. The rear valence is removable and my shop barrow is exactly the right height to simply roll the gearbox into position. After bolting up the front mounts and the drive shafts the box was in. I then reconnected the clutch cable and selector shaft and went to the cab to test it out. Fortunately the gear shift is not too sloppy, it could be better, but for the time it will suffice, especially as the main aim is simply to get the bus on the road and not to do a full on restoration.
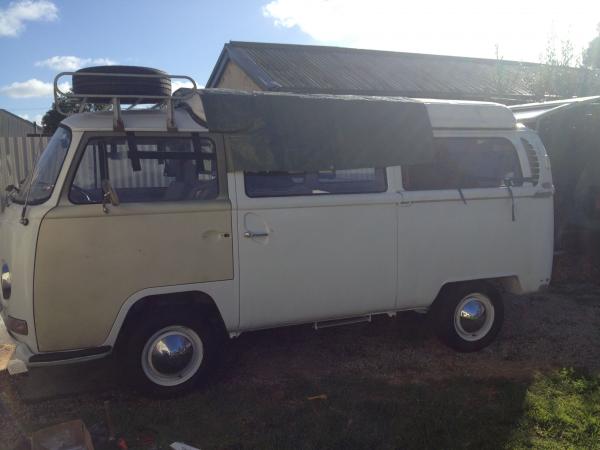
With the brakes and gearbox sorted the weekend is free to tackle repainting the doors and rear bumper.
(BTW if you are wondering what a 'Burnley' is - you should really swat up on your Monty Python.)
Comments