DIY Cab Floors

With the cab floor on the '55 looking like it needs replacing I decided to see if I could avoid having to buy a full repair panel by using the floor from a front cut that I have stored for my 15 window project. I have the front cut to provide a dashboard and chassis member to convert the 15 to right hand drive but for some reason the cab floor is nearly perfect. Not what you would really expect on a bus that ended up getting chopped up. Unfortunately whoever chopped the floor section out did not really do a very good job, not only did they gas axe an inch off of the floor on every side, but they also managed to cut straight through the chassis member that I need for the RHD conversion. Phah.
So I decided to dig the floor section out from the back of the 15 and take a look.

As you can see apart from a little rust and a few pin holes it's pretty good so I decided to cut it up to make some repair panels from...

With most of the floor sorted I decided to see if I could make myself a patch panel to replace the parts that were missing / rotten. I decided to put the skills I learned at the Peter Tommassini workshop to use and make myself a pattern. If you've never done this before, here's a step by step...
You'll need some carpenters pencils - Sharpen them like this - shave off half of one side to expose the lead like this...

You'll use the pencil to help trace the details of the panel through to the paper - just like using a crayon or chalk.
Using magnets to hold your template paper onto the panel start to trace the details...

Once done you can then transfer the pattern onto your metal. Note that this is a really simple shape. With a more complex panel you will likely have to cut darts or gather the paper to get it to conform to the panel shape. I traced the whole floor halve but will only make a panel about a third this size.
To transfer the pattern to your metal you lay the pattern over the metal and hold it in place using magnets. Then using a scriber scribe through the pattern to make marks in the metal...

You can just make out the marks made by the scriber in the photo below. You can then draw the pattern on with a texta to make it easier to see. I didn't do that here as I was only doing a test but it is a good idea as the scriber marks can be hard to see.

Of course you should use nice clean steel or clean up your steel with a scotchbrite pad but I did not do this here.
I only traced a portion of the pattern onto a scrap piece of steel that I had been using to test out the plasma cutter. I wanted to do a test run to make sure that the part would come out properly. To make the indented pattern in the panel I decided to use my swage rolling machine. I originally thought that to get the correct profile I might need to make some rollers on the lathe but after measuring the floor pressing details found that one of the sets of rollers that I already had was a pretty close match.

I didn't get any action shots of the rollers in use but here's the end result. It's far from perfect but as a proof of concept works for me. When I make the final piece I really need to mount the rollers a little lower as they were far to high when mounted in the vice on my bench, this made it hard to see the pattern feeding into the rollers and is part of the reason for my wobbly lines. I also need to install a guide on the rollers to assist with rolling straight lines.

I will clean up the cab floor section and work out how large the repair section needs to be. I'm pretty confident that I can make it work and not look too bad. I figure that every dollar I can save by making my own panels is a dollar I can spend on something else.
I finished the day up by straightening the dents from the inner headlight support panel. I managed to get most of the worst of the dents out, the ones left simply add to the character of the bus. I also offered up the dogs legs that I have but found that they are the later style with the thin lips so unfortunately no good. Guess I will have to figure something else out there.

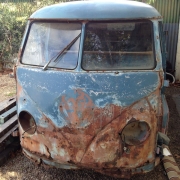
All in all a good weekends progress. At least now I can see what I'm in for. Bit disappointed that there is not more of the drivers A pillar left to work with, especially as this is a $500 part to replace! I think that if I give it a go I might be able to make one but need to sit down and figure it out. The recesses for the hinges and the pressings behind the hinges are a bit fiddly as the metal stretch outwards in two directions before shrinking back in. Not impossible to do but a more complex shape than I have made to date. Guess I won't know until I try!!
Roll on next weekend...
Comments