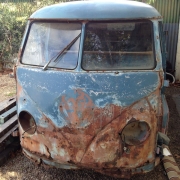
DIY Cyclops light

Been getting a bit distracted by cyclops lights recently. Not that the bus is anywhere near ready for trinkets, still plenty of metalwork to do before its time to add jewellery. So completely sidetracked I decided to scratch that particular itch and have a go at making a cyclops light myself. My reasoning was that it would be good metal shaping practice, plus I had kinda figured out how to make it in my head and wanted to see if I could actually do it.
From what I understand the cyclops lights were never an original VW accessory, they are in fact the lamp pod off of a 1940s Chevy. There's a couple of different versions of these pods, some have an additional light on the top, some sit closer to the fender and some stick right up. Quite how they ended up being stuck on the top of a VW bus I'm not sure but they're pretty cool looking and I decided that I wanted one for the delivery bus. So ever the skinflint that I am I decided to make one myself.

I started off by making a paper template and cutting out a piece of metal to the same shape. The basic template was a simple tube of the same diameter as an old H4 headlight that I had laying around in the garage. Any 7 inch headlight or spotlight will do. I traced the roof profile onto a separate bit of paper using a profile gauge, I then transferred this onto my tube template so that it (kinda) fitted the curve of the roof

I added an allowance to the edge of the template so that I could create a flange on the underside to bolt it onto the roof with, this would also allow a nicer finish to the bottom edge of the light pod where it meets the roof. Once I had transferred the template onto metal and cut it out I set about rolling it into a cylindrical shape on the rollers.

With the basic shape made I turned to the rear end where the shape tapers down into the roof. To make this curve I needed to shrink the metal on the rear edge to help it curve downwards. Rather than take the easy route and use the shrinking machine I decided to make some use of the tucking forks and get a bit of practice in. This involves tucking the metal and then dressing the tuck in to retain the shape - a bit like folding pleats in paper - which is exactly what you do when you make a paper template of a part. The result of tucking and shrinking is that the metal moves together and becomes thicker (all that metal has to go somewhere).

Don't worry about getting things looking nice and sooth at this stage, the main aim is to roughly move the metal into shape. Final planishing and dressing can come later. After some heavy shaping things were looking pretty bumpy so I smoothed the bumps out on the english wheel. After some time I ended up with something that looked a little like this.

At this stage I had already turned the bottom flanges under which may or may not have been the correct thing to do. The shape is nearly there although the light is pointing a little skywards. After a little more dressing I decided to jam the light unit in place and see if it fitted the roof of the '55.

Still some dressing in around the sides and the rear to do where it does not quite sit tight on the roof line but other then that not too bad.

With the shape nearly done I decided that the next thing to do would be to actually weld up the pod at the bottom so that it would hold its shape a little better, this way I could do the final aha;ping and planishing and things would stay put. To do this I needed to roll a recess in the front lip to take the lamp, I rolled this in using the rolling machine, I also took the opportunity to correct the angle of the light by rolling the recess at an angle to hopefully get the light to point a little straighter.
Making the recess I also needed to shrink some of the excess metal away on the shrinking machine, this is because the inner part of the lip is a smaller diameter and so the excess metal results in a wavy non round shape. I also trimmed the excess metal away using some hand nibblers to leave a nice lip.

The end result is not too bad. I'm happy enough to roll with it as it's only on a ratty bus but next time around I would take what I have learned and maybe do things a little differently. The return flange on the underside is really hard to form at the rear edge of the lamp, there's a lot of metal being shrunk in that area and it didn't turn out too pretty. I'd also take a lot more time making the template. I had limited materials for template making which definitely did not help as this meant that I had to make a few corrections to the bottom profile along the way, it would have been much better to only form this edge once. I would also make the return flange much smaller and make an additional bracket to fix it down with, this would make the flange much easier to work.
But even with all of these problems I'm pretty happy with it. It' still needs welding up on the underneath and final planishing as well as a period style light or lense but for a first attempt it's not too bad.

Comments 1
Might make another one of these