46mm Nightmare
Decided to sort out the brakes today. I had already ordered new shoes, cylinders, hoses and master cylinder, and whilst waiting for the remaining engine parts to arrive thought that it would be a good idea to fix up the other things on the todo list.
Anyone who has worked on a VW before would probably have encountered the dreaded rear axle nuts, and whilst there are a variety of different ways to crack that particular nut.
A long pipe on a t-bar and some judicious jumping on the end of it usually does the trick for me. However, this is where the trouble began...
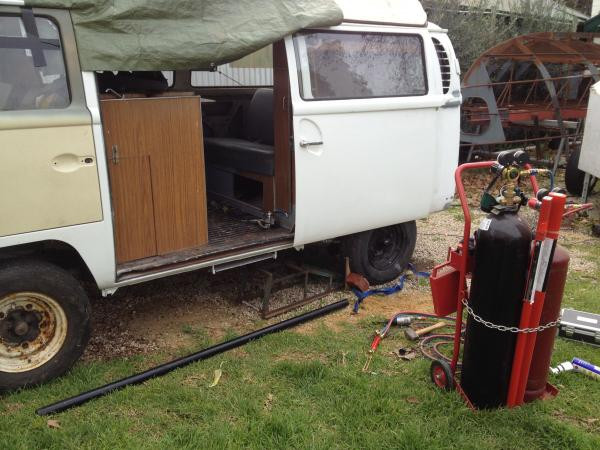
Last time I did this I didn't attempt to do it on a gravel drive, I also had an engine in the car, and the handbrake worked. No matter what I tried I simply ended up spinning the wheel in the gravel. I even dragged out he oxy set and the rattle gun from the garage to no avail. After about 3 hours of battling with the nut I finaly admitted defeat and decide to grind it off.

Weapons of mass destruction
I really didnt want to grind the nut off, but having a gravel driveway seemed to make the whole thing impossible, no matter how I chocked the wheel it simply span when I put pressure on to it. The main issue was that the brakes were non existent so there was no option for getting someone to push the pedal down whilst I losened the nut. The same was true for the handbrake. In the end I sliced off a section of nut and then ground down to the thread. I then drifted the nut lose with a cold chisel. in all it took about 5 minutes. Wish I'd have done this in the start.

Make an incision and remove the segment with cold chisel...

...Grind back until you can just about see the thread...

...Using your favourite cold chisel get the nut moving...

...The removed nut. Notice no damage to the axle thread ;)
With 3 hours already lost I dove in to fitting the new shoes and cyllinders. I inspected the drums, which had pretty much no wear at all, so I cleaned them up with a wire brush, sand paper and then some brake cleaner to finish. I also gave the backing plates a quick brush down as well.
I disassembled the adjusters, cleaned them up and refitted them with a nice smear of copper slip (anti-sieze grease), this should hopefully keep them functioning for a long time to come. I fitted the new shoes but had to clearance the hole for the handbrake pivot as it was a little too tight to fit. One good tip for fitting the soes is that the brake cylinder piston has a slot in it that the shoes must sit in. The dust boot on the cylinder also has a slot that the shoe must pass through. I find that it is easier to remove the dust boot and fit it to the shoe, this exposes the piston and allows you to turn it with a screwdriver the align it if necessary. Once everything is fitted you can then stretch the dust cover over the cylinder.

Before...
After refitting the drums I adjusted them so that they were binding a little and then backed them off a few clicks. I will need to slacken off the handbrake and readjust the rear brakes once the system is bled. I will also need to order some new axle nuts.

...After
Unfortuantely I started to lose the light a little so decided that rather than tackle the front brakes I would refit the new master cyinder. Before I could fit it I swapped over the brake switches and the fluid reservior which I cleaned up a litle.
Fitting the master cylinder was a little tight as the brake lines had quite a bit of tension on them, this meant that they were a little difficult to get into position. I bent them a little to remove the tension which helped a lot and will hopefully remove any undue stress on them. Fortunately the master cylinder came with new rubber grommets for the reservior and a new dust boot which was just as well as the old one was completely shot.
With the new master cylinder fitted there was finally a bit of movement to the pedal. Of course the system needs to be bled before the brakes will work but that will have to wait until I've finished overhauling the front brakes.


Comments