Door Capping
I've long wanted to make some original style steel door cappings for my speedster. Whilst repros can be purchased they seem to be almost as expensive as my car. Karmann Konnection in the UK have some listed at AU$1k for the pair. Far too rich for my taste.
So I decided to make a small test and build a prototype to see if I could figure out the best techniques for making them.
The capping or garnish trim as some people refer to them are elliptical in cross section, starting off almost flat to the door top and curving round in an increasing diameter to meet the door at the top of the door trim card. The front edges are angled to match in with the dashboard / door shut lines, whilst the rear edge is stepped to form around the B-pillar. They are held in place by two countersunk screws and also integrate the mounting post holes for the side screens.
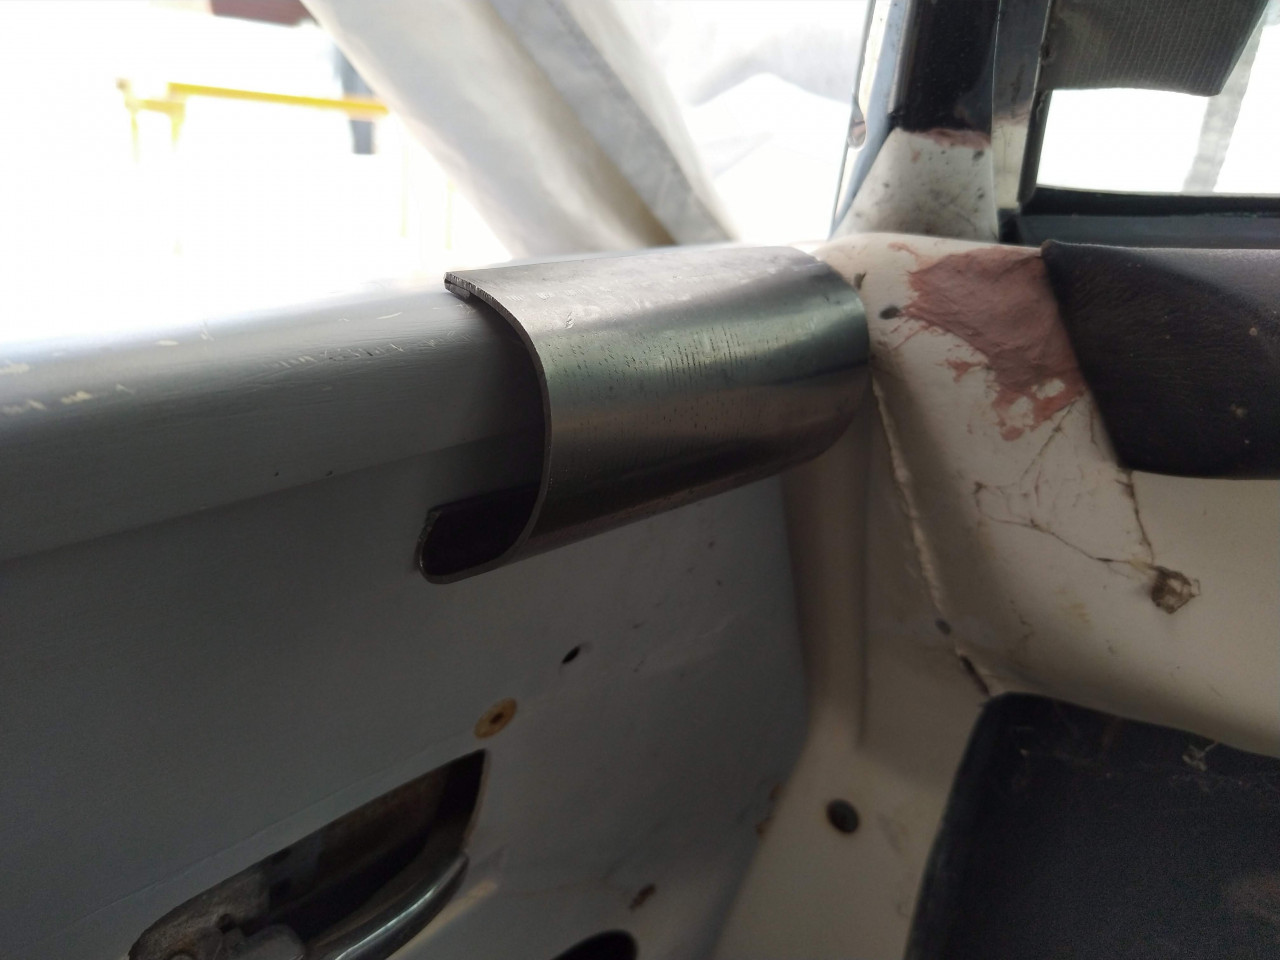
As I work with exhaust pipe a fair bit I decided to try and make the prototype from tube rather than trying to form it from flat, I think that either method could be made to work but the tube was handy so that's the way I decided to go. I removed a small section from the tube along its length and opened up the radius a little to allow me to get the ends of the section into the press-brake. One side needs to be completely bent back against itself to form a rolled edge, this is the top part of the trim that is visible and so needs a cosmetic finish. The other side is formed to sit flush against the door and to a degree is hidden by the door card.
I bent both sides as far as I could in the press-brake, which was not enough, but at least it gave me a good edge from which I could then set the final bends manually with a flange setting tool and planishing hammer. I planished one flange flat back against itself and after a small amount of tweaking set the curve and other flange to somewhere near where I wanted it.
The tops of my doors have a small upwards curve at the inside edge, This seems to be a little more pronounced than on original cars. I may have to shave this down a little to get the capping to sit properly but will know more when I've made the full length versions. By complete fluke the depth of the capping seems to be about the same as the dash trim, which is a nice outcome considering that I just used a bit of scrap off-cut. If anyone is interested I used 57mm diameter exhaust tube (2 1/4") 2" would likely also work.
I'm happy with the results, the ends should not be too hard to finish off but I won't bother to do these on this test piece. Likewise I will not weld in the post supports.
A note on the post supports. I have some original aluminium sliding windows that already have posts fitted, I also have some glass side windows that have holes pre-drilled as well as the stay-fast side windows that were supplied with my hood, although these are yet to have the posts fitted. So at some point before mounting the post support pockets I need to determine the correct / best location for the post locations. It makes sense to mount the holes to align with the glass side windows as those cannot be altered. The aluminium sliding windows have a non-standard repair which looks to have moved the original post locations so if these need to be modified then so be it. I'm also not sure where the tie-down point for the side windows is - normally the canvas side windows have a leather tie down strap somewhere in the centre but I'm not sure if this is on the door or the door capping. Minor details that a quick trawl through my stash of photos could probably fix.
Here's some photos of the process...


Comments